You have thousands of photos scattered across phones, hard drives, Dropbox, Google Photos, printed albums, and that shoebox in the closet. Every year, the pile grows. Every year, finding “that photo from Aunt Carol’s wedding” gets harder. It’s time to build a system.
This guide gives you a complete workflow for organizing all your photos — from the oldest printed snapshots to your smartphone’s live photos — into a system you’ll actually maintain.
Step 1: Take Stock of What You Have
Before organizing, find everything. Photos hide in surprising places:
- Printed photos (albums, loose prints, shoeboxes)
- Old phones and tablets
- Computer hard drives (external and internal)
- Cloud services (Google Photos, iCloud, Dropbox, Amazon Photos)
- Social media (Facebook, Instagram, Flickr)
- Email attachments you’ve saved
- SD cards and USB drives
Create a master inventory. You don’t need to catalog everything immediately — just understand the scope. Count how many physical photos you have and estimate how many digital ones. This tells you what you’re dealing with.
Step 2: Set Up Your Central Hub
Pick one primary cloud service as your “single source of truth.” This is where all your photos eventually live. Don’t try to maintain photos in multiple places simultaneously — you’ll never keep them synchronized.
Recommended: Google Photos for Android users, iCloud Photos for iPhone users. Both offer excellent face recognition, search, and automatic backup from your devices.
Set up automatic backup from every device you use. This is non-negotiable — if a photo isn’t automatically backed up, it will eventually be lost.
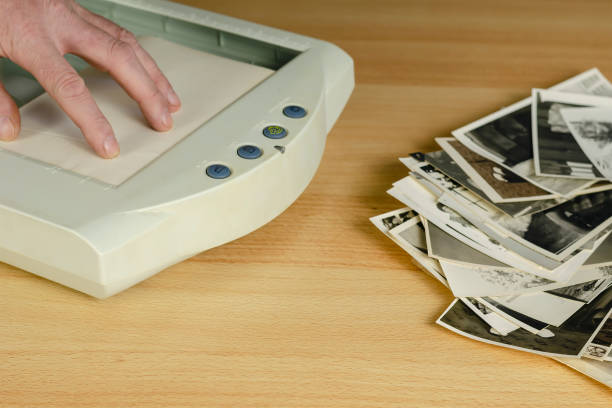
Step 3: Scan Physical Photos
Physical photos are the most vulnerable — they’re one flood, fire, or house fire away from being gone forever. Digitize everything meaningful.
You have two options:
- DIY scanning — Use a flatbed scanner like the Epson Perfection V600 for quality, or the Epson FastFoto FF-680W if you have hundreds to process. Professional scanning services are an option for large collections.
- Photo scanning apps — Your smartphone can scan photos surprisingly well using apps like Google Photos’ built-in scanner or Microsoft Lens. Free, instant, good enough for social sharing.
Whatever method you choose, scan at 300 DPI minimum. Save as JPEG for sharing, original TIFF or high-quality JPEG for archival.
Step 4: Establish a Naming and Tagging System
Facial recognition has largely eliminated the need for manual face-tagging, but events, places, and dates still matter. Here’s the system that works:
Dates
Enable automatic date correction in your photo app. Photos imported from phones usually have accurate EXIF dates. Photos from scanners often have today’s date — correct them manually. Most photo apps let you batch-adjust dates.
People
Google Photos and Apple Photos both build facial clusters automatically. Help them by confirming faces and adding names. The time investment pays off — searching “Mom in 1998” should return relevant results.
Places
Enable location tagging on your phone’s camera. For old photos, add location manually if you know where they were taken. Even approximate locations (“Grandma’s house, Ohio”) help.
Events
Create albums for major events: “Smith Family Reunion 2019,” “Sarah’s Graduation,” “Tokyo Trip 2018.” Both Google Photos and iCloud create automatic event albums from dates and locations — use these as a starting point.
Step 5: Cull Ruthlessly
You don’t need to keep every photo. Culling reduces your library to the best moments:
- The blurry test — If it’s out of focus, delete it.
- The duplicate test — Keep the best version of near-identical shots. If you’re team camera, keep the best-lit, best-composed version.
- The meaningful test — Does this photo tell you something? Capture a moment, a person, a place that matters? Keep it. Memes, screenshots, and random photos you’re “probably going to need someday” — you won’t.
Be brutal. A 500-photo library you actually look at is worth more than 15,000 photos you never review.
Step 6: Back Up Everything
Cloud backup isn’t enough on its own. Use the 3-2-1 rule:
- 3 copies of every important photo
- 2 different storage types (cloud + external hard drive)
- 1 copy off-site (cloud or a drive stored at a different location)
If you have photos that are genuinely irreplaceable — original scans of old family photos, documents — consider a dedicated archival service. Amazon Photos (with Prime) is free for unlimited photos and serves as a good secondary backup.
Step 7: Maintain the System
An organized photo library requires ongoing maintenance:
- Weekly: Import and organize photos from the past week. 15 minutes max.
- Monthly: Review and cull new burst-mode photos and screenshots.
- Annually: Do a full review of one year, back up new printed photos, verify cloud backup is working.
The Tools You Need
For this workflow, you’ll benefit from:
- Cloud photo service — Google Photos or iCloud Photos
- Photo organization software — Adobe Lightroom or Mylio if you’re a serious photographer
- Scanner — Flatbed or sheet-feed scanner for physical photos
- External hard drive — For local backup (WD My Passport, Seagate Backup Plus)
The Bottom Line
Photo organization isn’t a one-time project — it’s a habit. Build the system correctly once, then do weekly maintenance. The goal isn’t a perfect library; it’s a library you actually use and enjoy. Photos you can’t find are photos that don’t exist.
Start with Step 1: find everything. You can’t organize what you can’t find.
This guide was last updated April 2026.
See also: Complete Guide to Digitizing Photos.
See also: How to Clean Old Photos Before Scanning.
See also: Best External Hard Drives for Photo Storage.
Leave a Reply